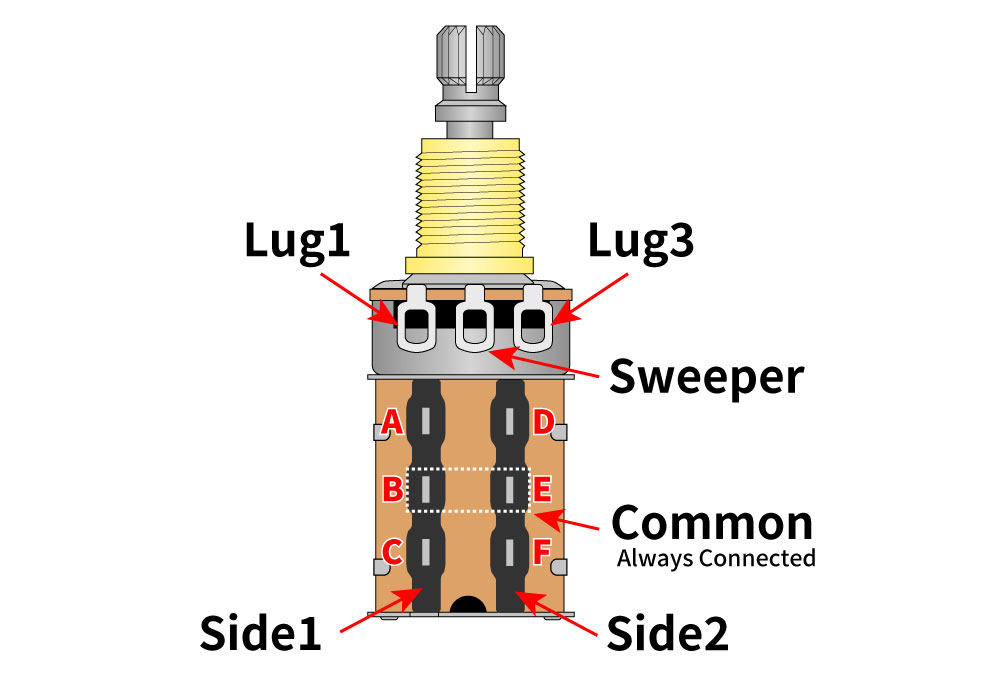
“When pushed down, the Selector interacts with the bottom 4 lugs (B-C-E-F).”
B connects to C
E connects to F
“When pushed (again) to pop up, so it does with the top 4 lugs (A-B-D-E).”
B connects to A
E connects to D
As you can see, B and E stay connected.
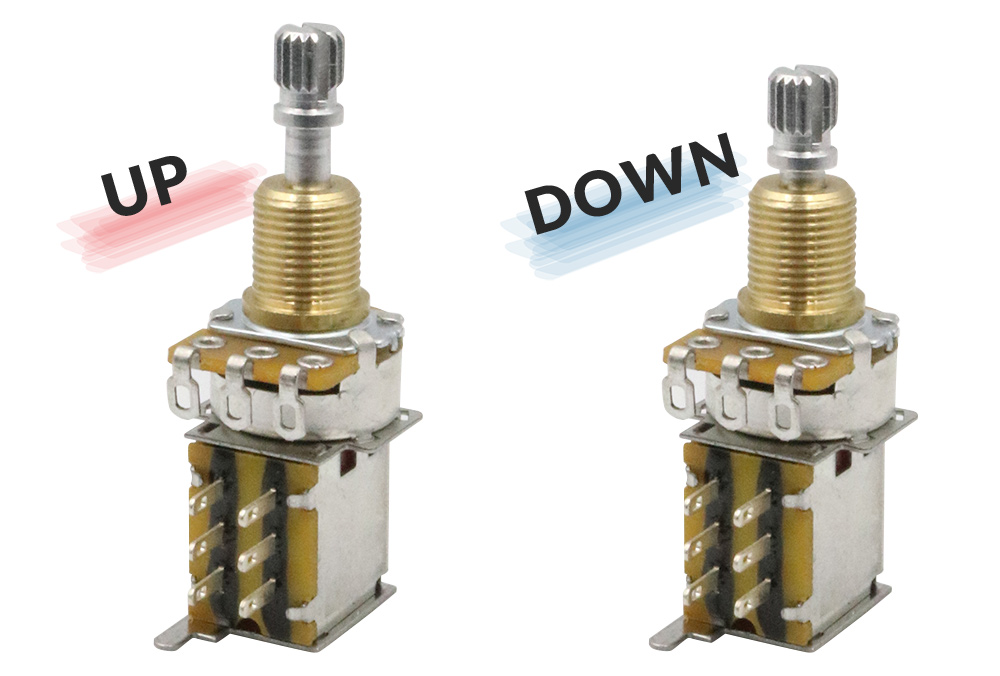
As four variations (250K A type, 250K B type, 500K A type and 500K B type) are available, you can connect and wire any pickups.
A type : Audio taper
B type : Linear taper
Caution
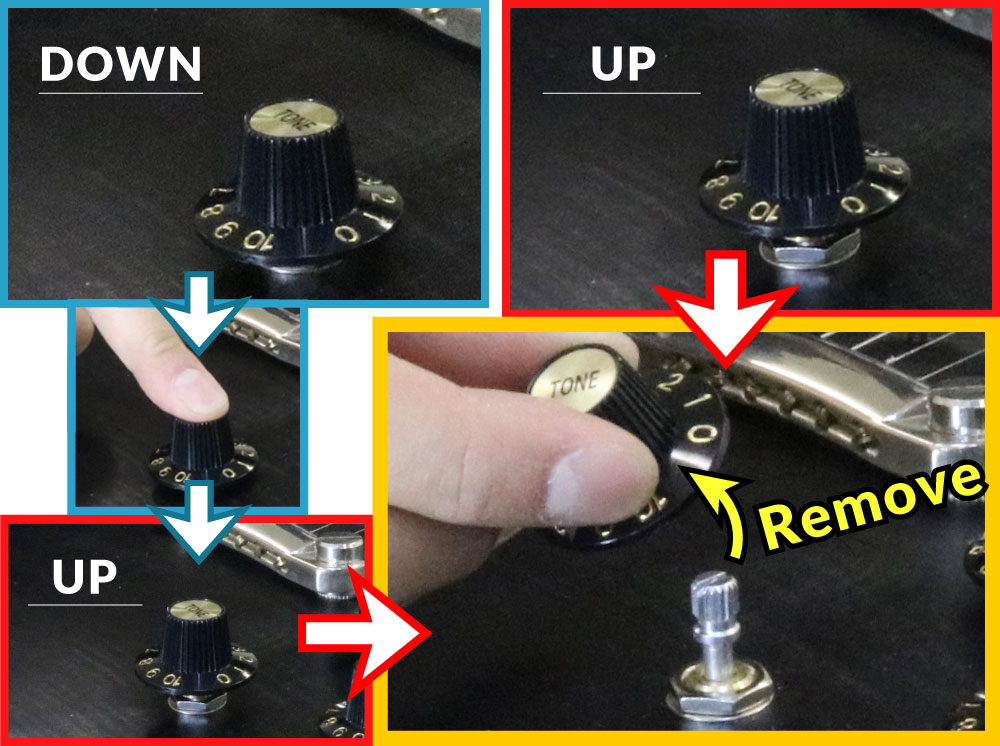
Make sure to remove knobs when the shaft is UP, not when it’s pushed all the way down.
“When pushed down, the Selector interacts with the bottom 4 lugs (B-C-E-F).”
B connects to C
E connects to F
“When pushed (again) to pop up, so it does with the top 4 lugs (A-B-D-E).”
B connects to A
E connects to D
As you can see, B and E stay connected.
As four variations (250K A type, 250K B type, 500K A type and 500K B type) are available, you can connect and wire any pickups.
A type : Audio taper
B type : Linear taper
Caution
Make sure to remove knobs when the shaft is UP, not when it’s pushed all the way down.
How to use
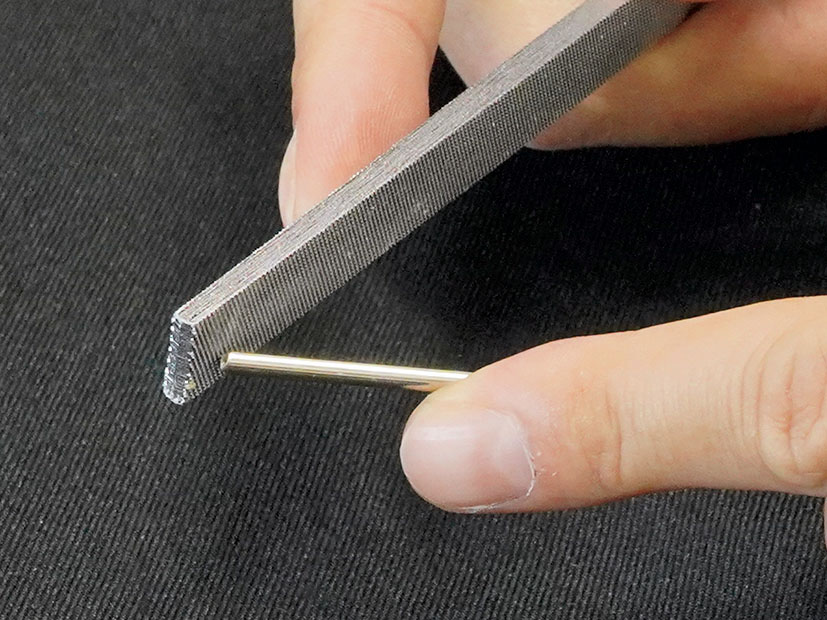
① Check the fret ends before use. If there are
burrs on them, remove burrs with a file.
*Burrs may cause accelerated groove wear,
damage, or injury.
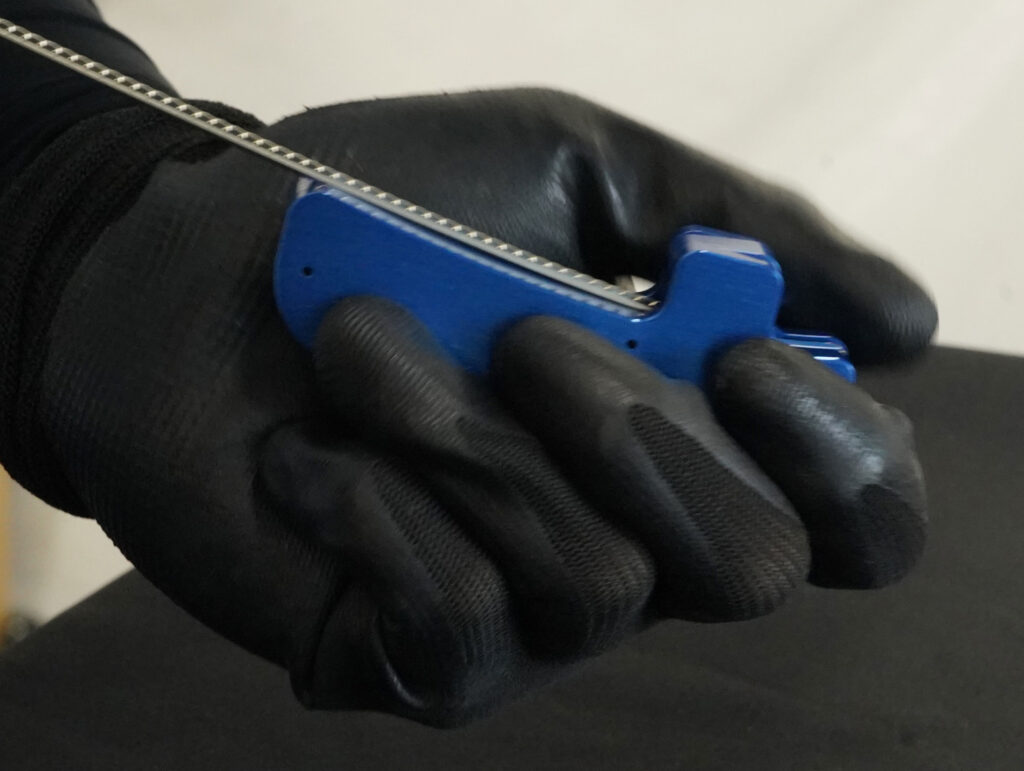
②-① Loosen the Adjustment Screw and lower
the Lower Guide to its lowest position.
Then insert the fret wire into the groove,
guiding it toward the Lower Movable Guide.
*If the guide is not fully lowered, it may be hard
to insert, causing damage or injury.
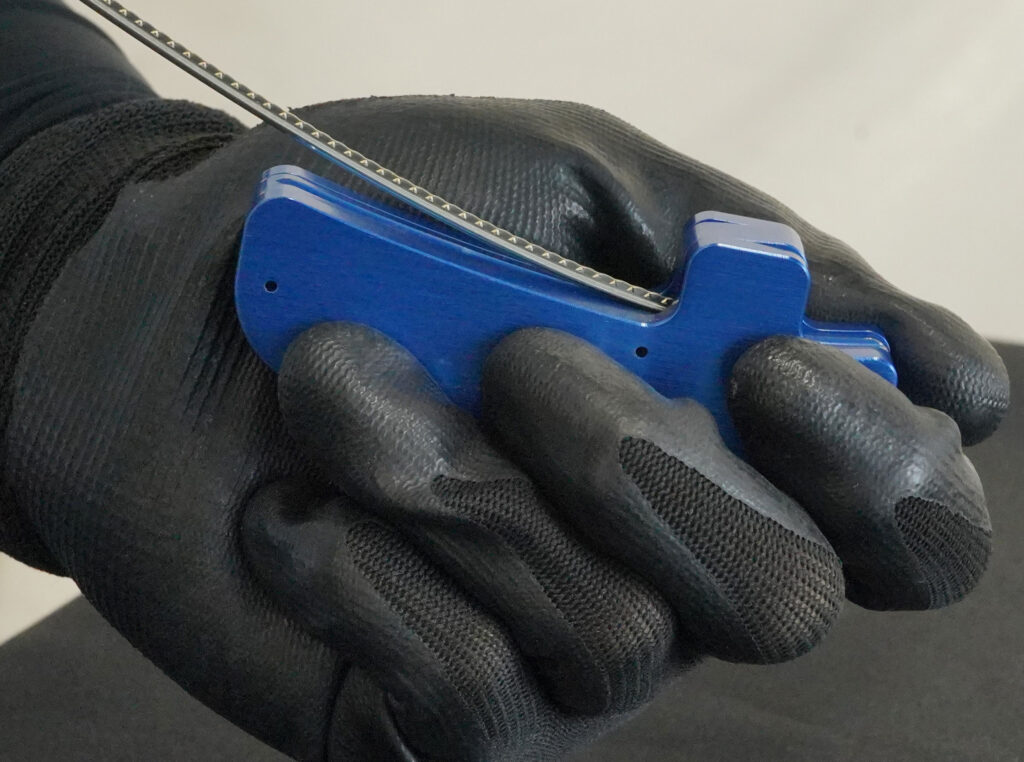
②-②Some fret wire may be difficult to insert
depending on the type. Try slightly bending
the fret end using the Upper Guide as leverage.
*As the bent end does not have a uniform
curve, cut off the end before installing the fret.
③ As you push the fret wire through, it will
come out with a curved shape. Push steadily
and carefully to achieve an even bend.
*Do not tighten the Adjustment Screw while
the fret is being bent. This may stress on the
screw or the Lower Guide, causing damage.
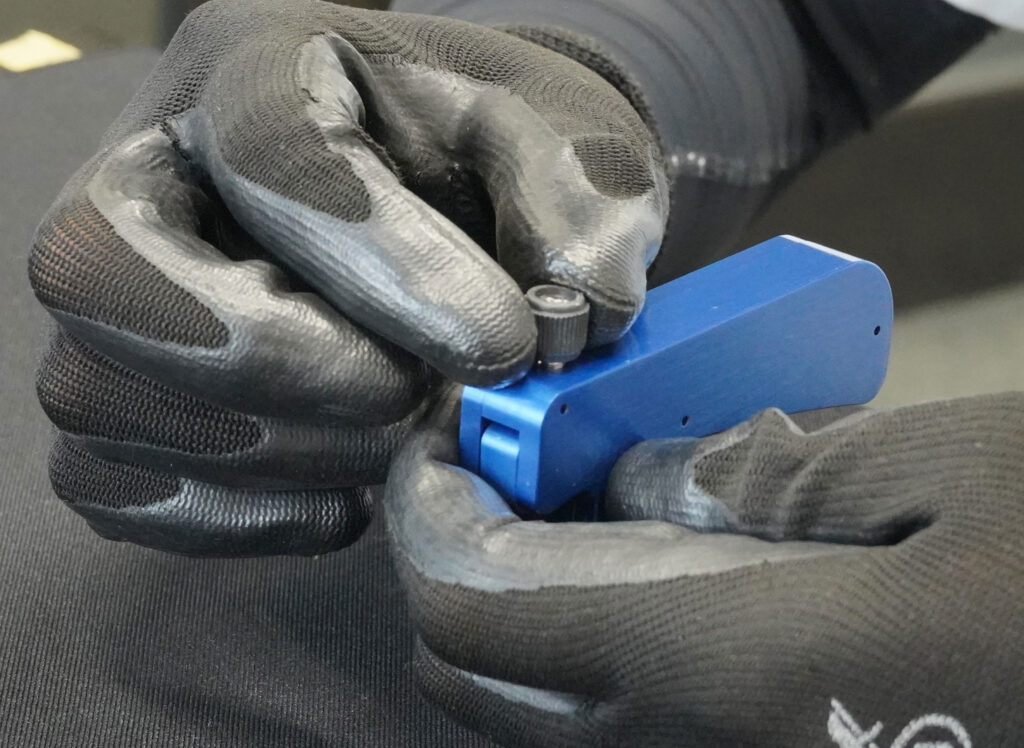
④ If you wish to bend the fret tighter, slightly
tighten the Adjustment Screw a nd repeat
Step ③.
*As a guideline, turn the screw 30‒45 degrees
clockwise at a time to gradually increase
curvature.
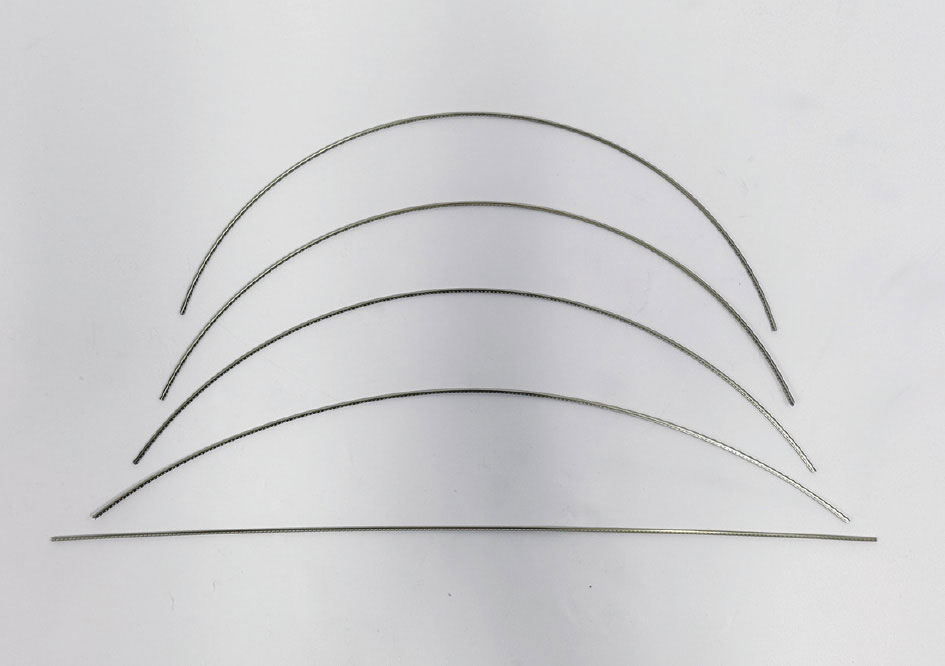
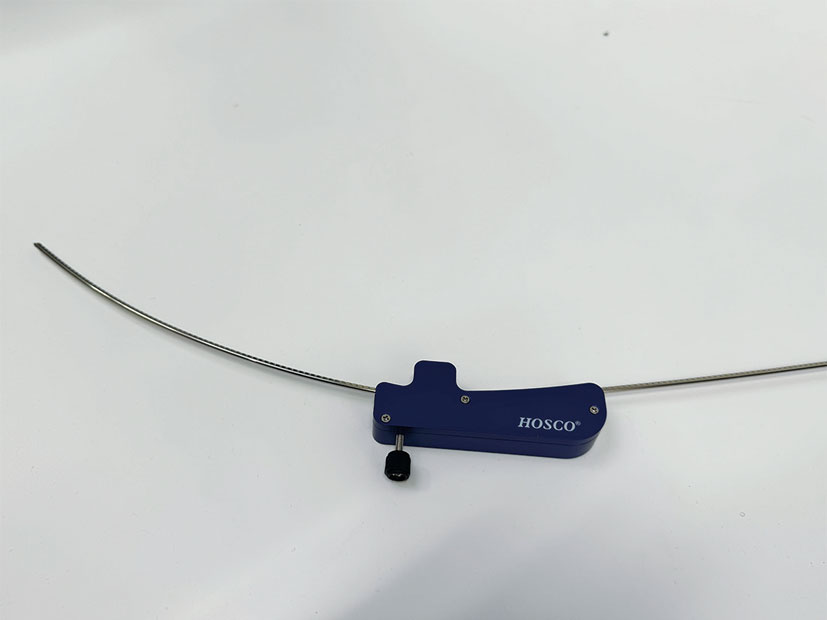
A straight fret can be curved from approximately
406 mm (16″) down to 184 mm (7.25″).
Caution!
● Try not to bend the fret wire too steeply at a time.
This may stress the tool and wire, causing damage or injury.
● For your safety and easier use, we would recommend you to wear work gloves during operation.
Keep your fingers away from the end of the tool where the bent fret wire comes out.
● We carry out a surprise inspection before shipping for quality assurance purposes.
Any mark from the testing on the product may prove the quality confirmation.
● Keep out of reach of small children.
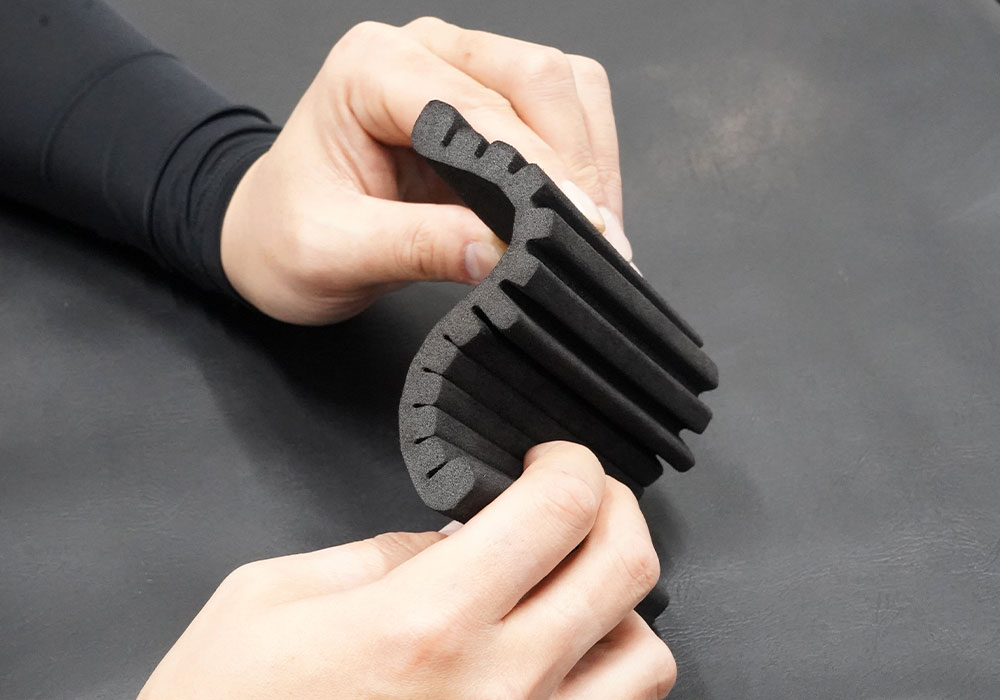
Transformable design
Instead of common “ready-rounded” sanding pads, with elastic rubber or sponge wrapped on sturdy material, H-FSP1, HOSCO Flexible Sanding Pad, has been developed to flexibly and freely follow the curve, while keeping as close contact of abrasive against workpiece as possible.
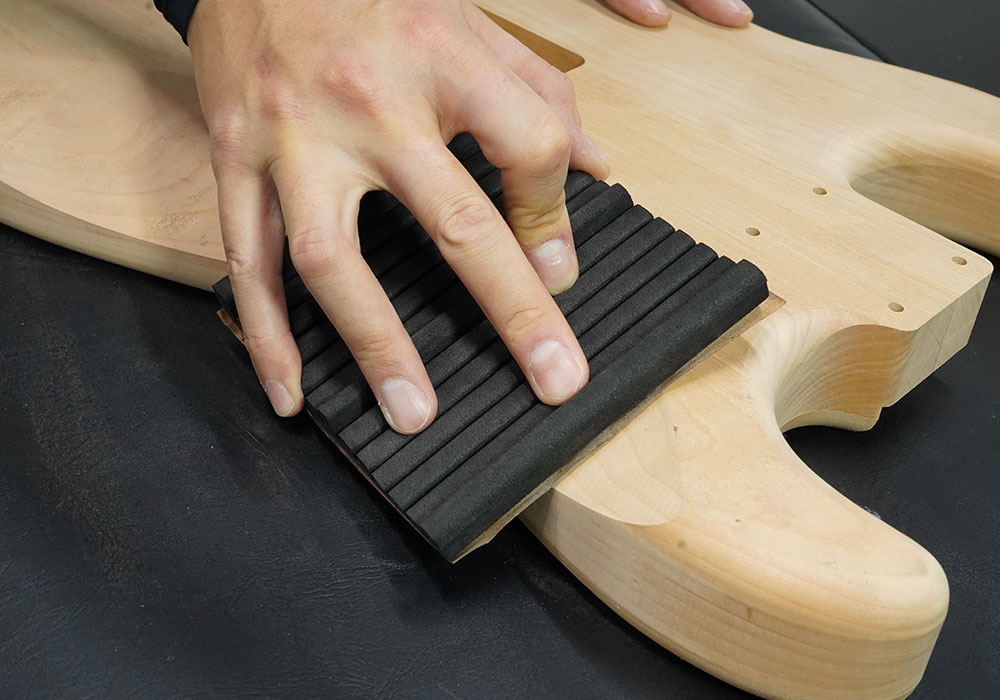
Adaptability
H-FSP1 won’t limit your application: needless to mention, thick and wide bodies of acoustic guitars in general, neck grips of half-circle shape and contoured cut of solid guitar bodies.
It is up to you to find a new usage.
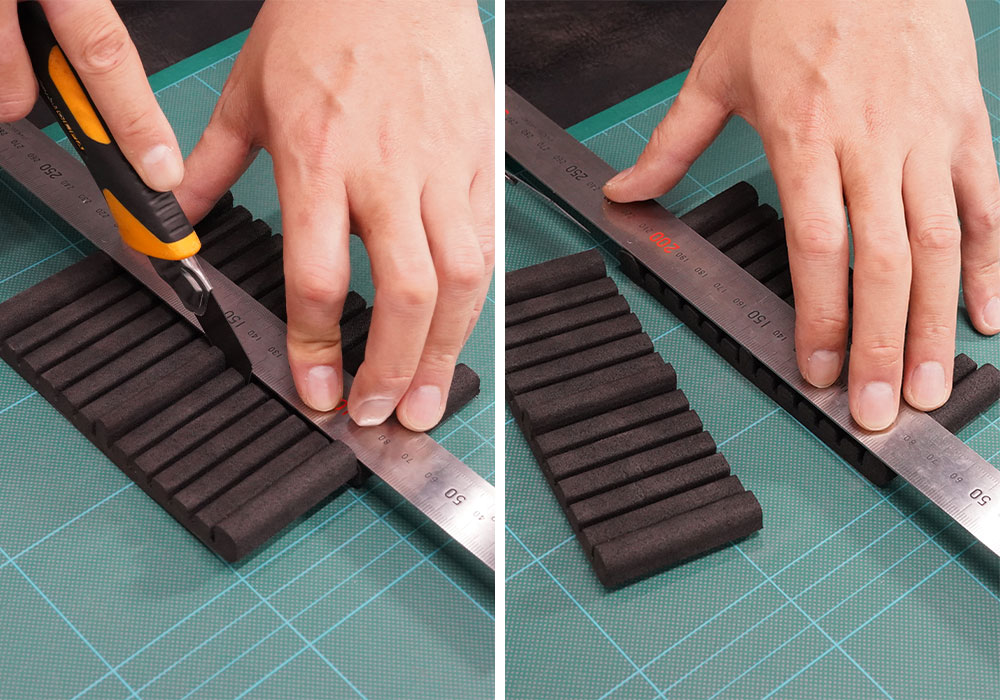
Freedom of custom sizing
EVA resin has been adopted for both free-forming and customizing to your preferred cut with a box cutter. You may now have your one and only pad for whatever woodwork.
Characteristic of the color of oxidization
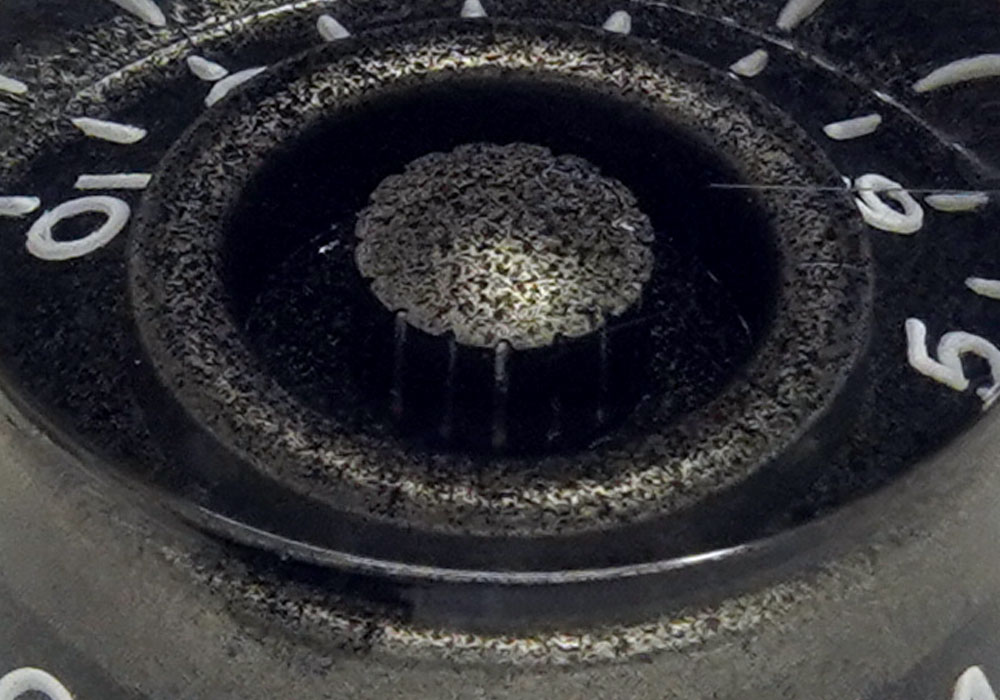
An unintentional exquisite tint may be derived from the smoky-ish rust, as if it had been deepened in a long lapse of time.
We believe that distinctive aged look is appealing to those in love with the old “curved-top” gears.
The back of the oxidized knobs
Embossed numbers look like vintage.
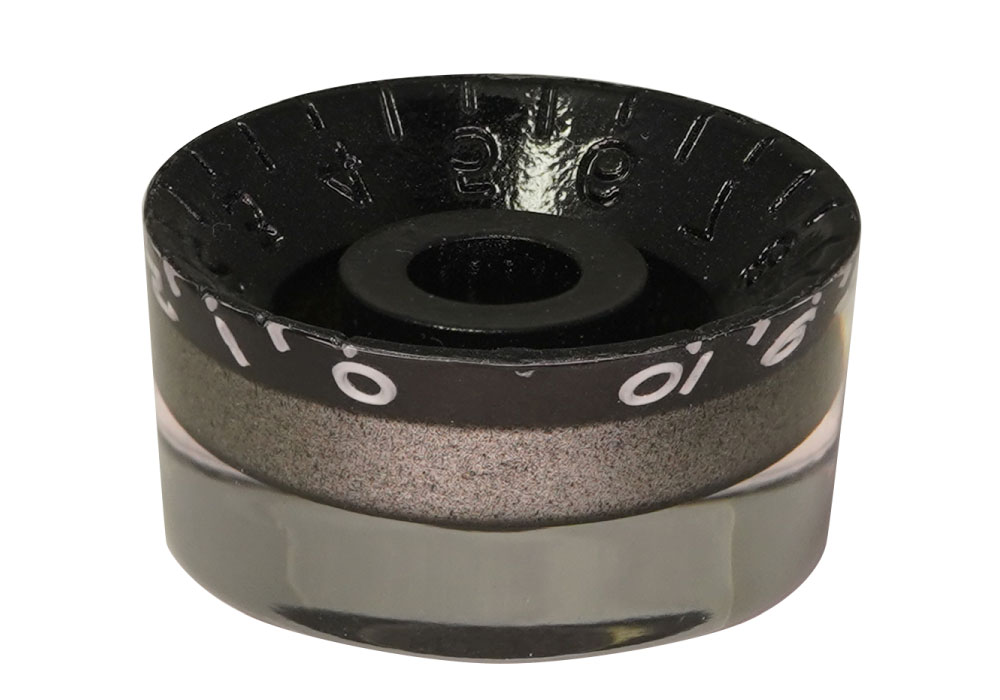
The back of the oxidized knobs
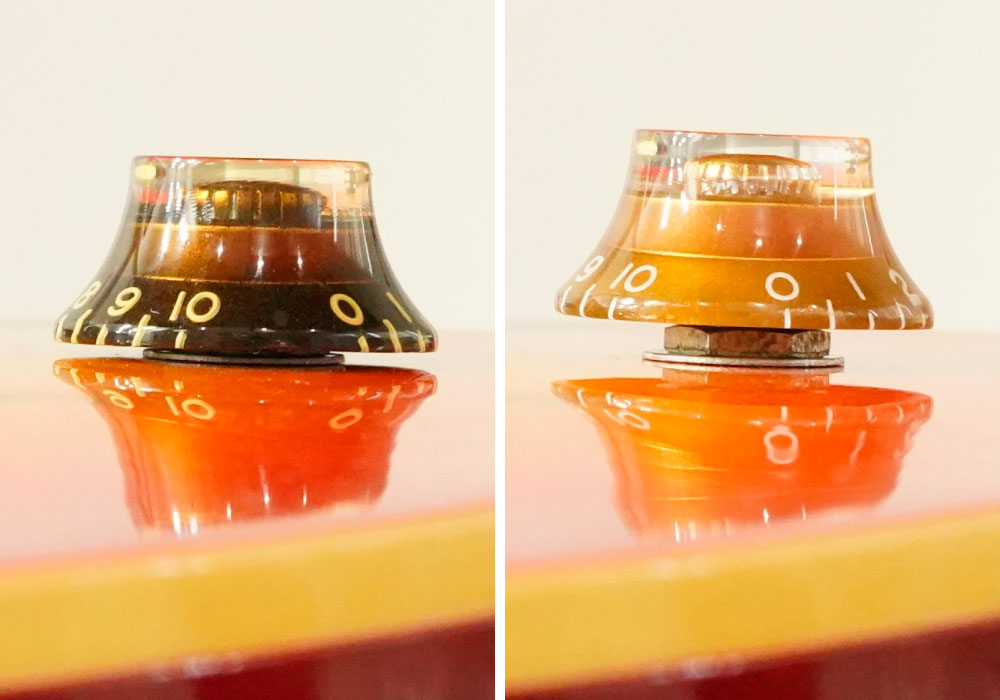
The oxidized knobs have the “recessed bottom” at the back.
It allows the knob to sit low and close to the top of the guitars body like modern style guitars.
In addition, the recessed bottom has specially been developed to enable to install onto both metric and inch potentiometers, “Multi fit”.
Note
In rare cases, you may find them difficult to attach onto pots due to slight inconsistencies in production lot.
Otherwise the appearance may differ due to handwork.
These are for EXPORT SALES ONLY.
Characteristic of the color of oxidization
An unintentional exquisite tint may be derived from the smoky-ish rust, as if it had been deepened in a long lapse of time.
We believe that distinctive aged look is appealing to those in love with the old “curved-top” gears.
The back of the oxidized knobs
Embossed numbers look like vintage.
The back of the oxidized knobs
The oxidized knobs have the “recessed bottom” at the back.
It allows the knob to sit low and close to the top of the guitars body like modern style guitars.
In addition, the recessed bottom has specially been developed to enable to install onto both metric and inch potentiometers, “Multi fit”.
Note
In rare cases, you may find them difficult to attach onto pots due to slight inconsistencies in production lot.
Otherwise the appearance may differ due to handwork.
These are for EXPORT SALES ONLY.
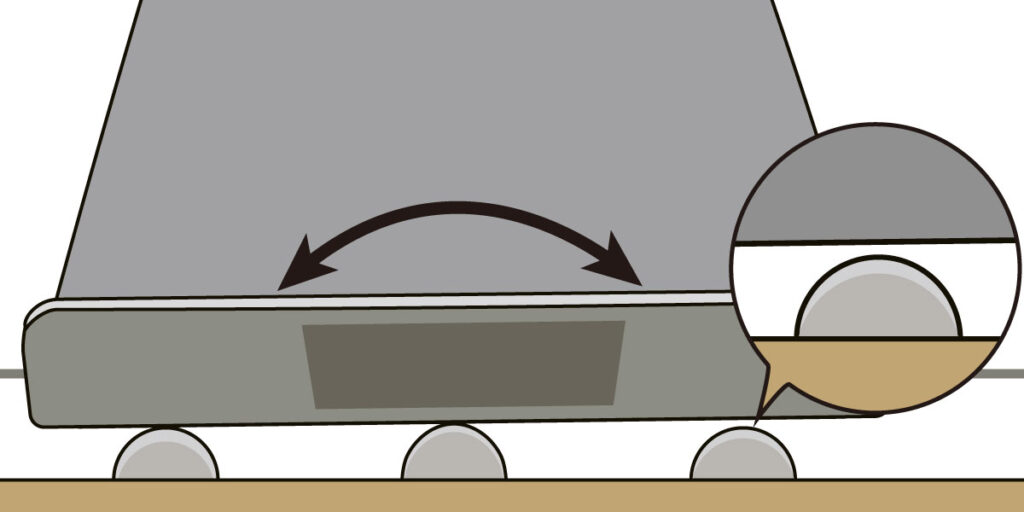
How to use
Try to find an edge perfectly spanning 3 frets
1) Viewing it sideway, see if the edge you picked nicely touches 3 adjacent frets.
In short, only three protrusions of frets should evenly be situated lengthwise.

You can check the fret level while strings are on!
2) Set the Zone file so that it passes under the strings to be checked. Select a zone file that is long enough to span the three frets to be checked. Tilt the zone file so that its edges touch the three frets, and check with both hands to see if there is any rattling. If there is no rattling, move the file by one fret and continue the check in the same manner.
You can adjust the fret level while strings are on!
3) If there is any sagging, it means that the center fret is high.
Set the Zone file so that the diamond file surface touches the fret, and gradually sand it to adjust.
While doing this, check as in step 1) to see if the fret level is even.
If necessary, remove the strings and shape the crown with a crown file.
How to use
Try to find an edge perfectly spanning 3 frets
1) Viewing it sideway, see if the edge you picked nicely touches 3 adjacent frets.
In short, only three protrusions of frets should evenly be situated lengthwise.
You can check the fret level while strings are on!
2) Set the Zone file so that it passes under the strings to be checked. Select a zone file that is long enough to span the three frets to be checked. Tilt the zone file so that its edges touch the three frets, and check with both hands to see if there is any rattling. If there is no rattling, move the file by one fret and continue the check in the same manner.
You can adjust the fret level while strings are on!
3) If there is any sagging, it means that the center fret is high.
Set the Zone file so that the diamond file surface touches the fret, and gradually sand it to adjust.
While doing this, check as in step 1) to see if the fret level is even.
If necessary, remove the strings and shape the crown with a crown file.